站长资源平面设计
Photoshop设计制作藤蔓中露出的金色墙壁字
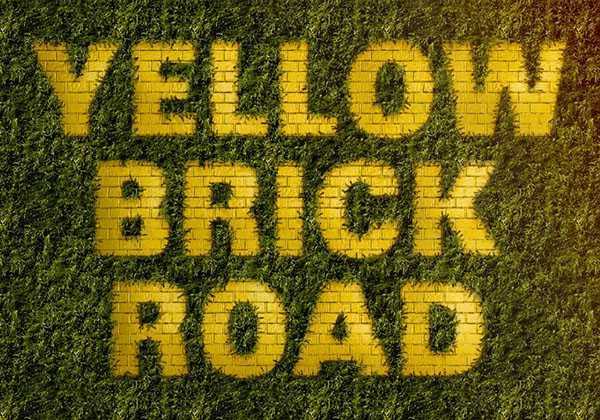
简介效果图非常有创意,不过制作的时候一定要注意好顺序:先用图层样式做出砖块文字;然后在顶层填充藤蔓,再调出文字选区,反选后添加图层蒙版;最后用特殊的笔刷涂抹蒙版边缘,让文字与藤蔓融合即可。最终效果1、新建图层1000*700px,在这个教程里我们用的字体是“SansBlack”哦
效果图非常有创意,不过制作的时候一定要注意好顺序:先用图层样式做出砖块文字;然后在顶层填充藤蔓,再调出文字选区,反选后添加图层蒙版;最后用特殊的笔刷涂抹蒙版边缘,让文字与藤蔓融合即可。
最终效果
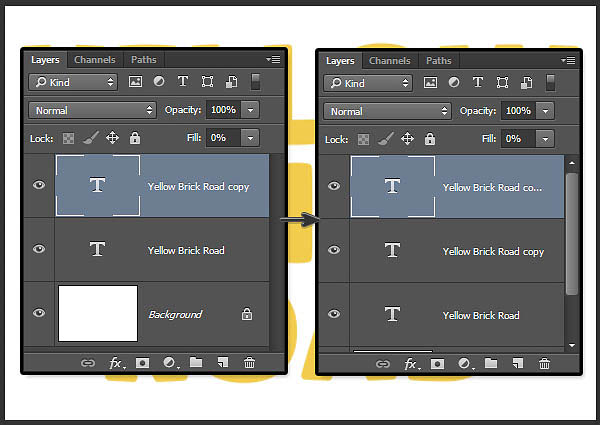
1、新建图层1000*700px,在这个教程里我们用的字体是“SansBlack”哦~字体大小为230px,颜色是#f1cc4c。复制文字图层,改变填充为0%,然后复制它一次。
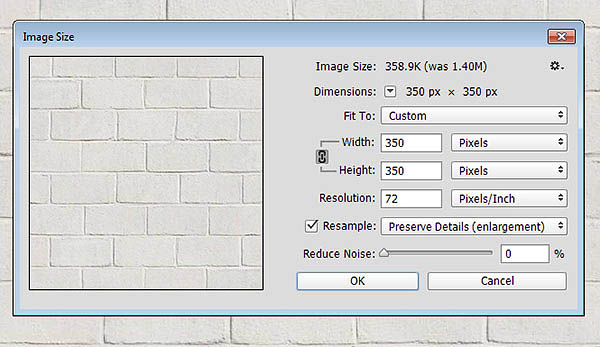
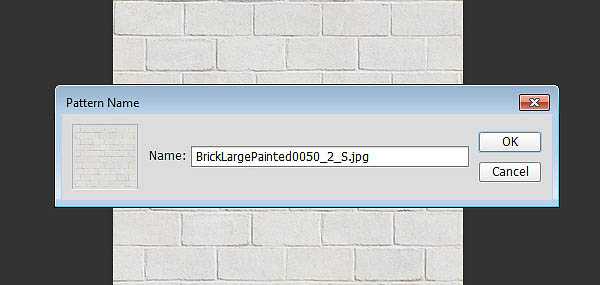
2、现在我们要打开“ BrickLargePainted0050 ”素材,然后去图像>图像大小,改变其大小为350*350px。
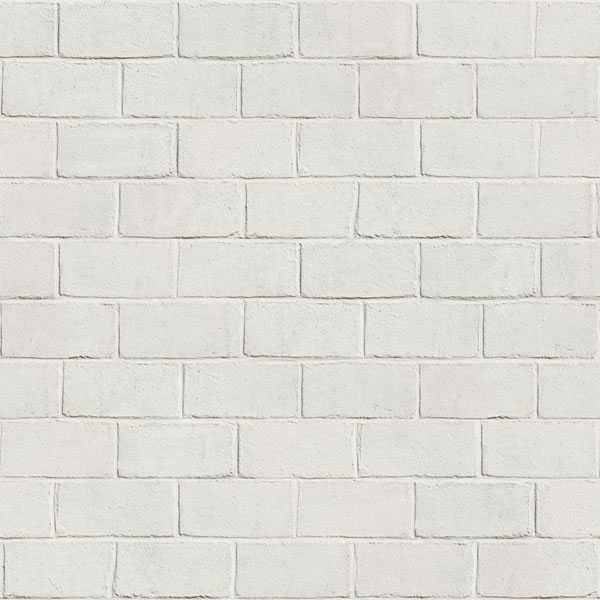
3、编辑>定义图案,确定。
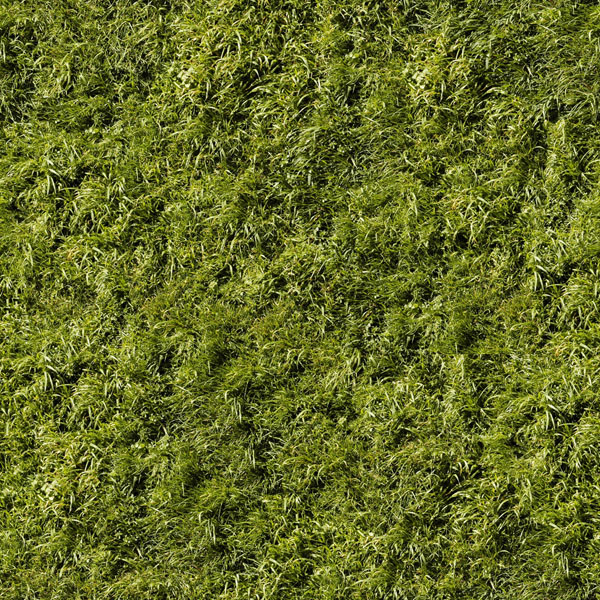
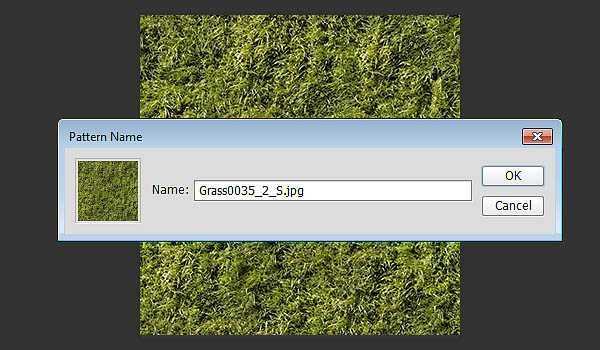
4、打开“Grass0035”素材,改变其大小为320*320px,也将其编辑成自定义图案。
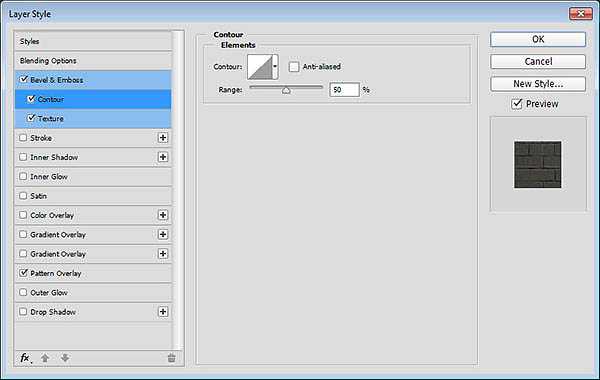
5、原文字样式设置:打开图层样式,斜面与浮雕: 内斜面,平滑,深度 100px,大小1,高光模式 :柔光,透明度50%,角度120°,阴影模式:正片叠底,透明度:10%。
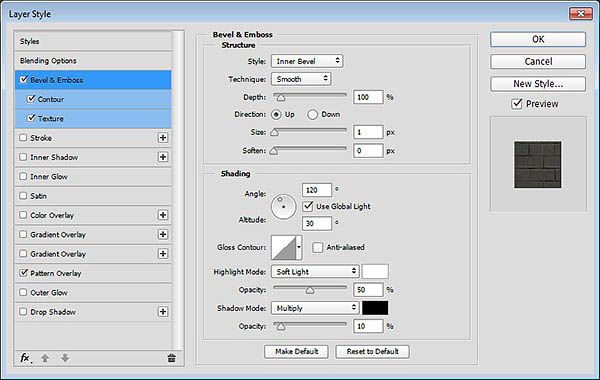
等高线设置,范围:50%。
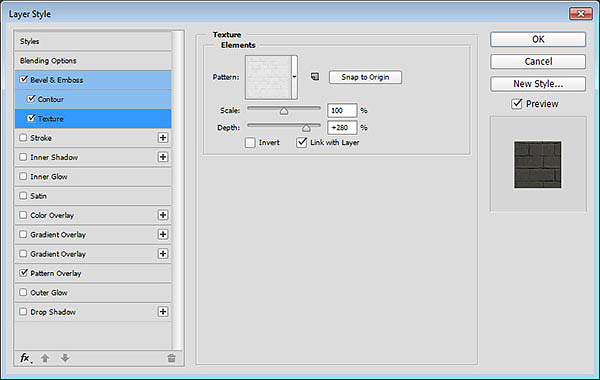
添加纹理,使用我们刚刚设置好的砖块纹理哦,宽度:280%。
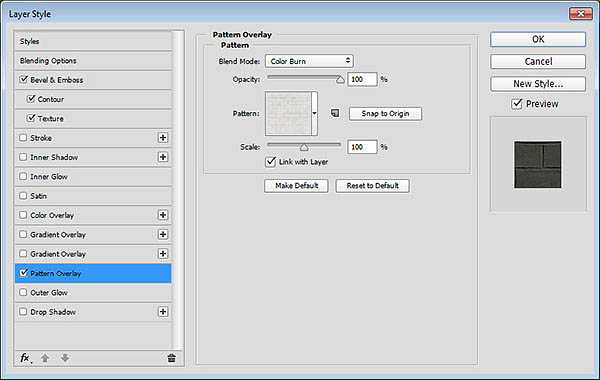
图案叠加,颜色加深,图案使用我们刚刚设置好的砖块纹理哟。
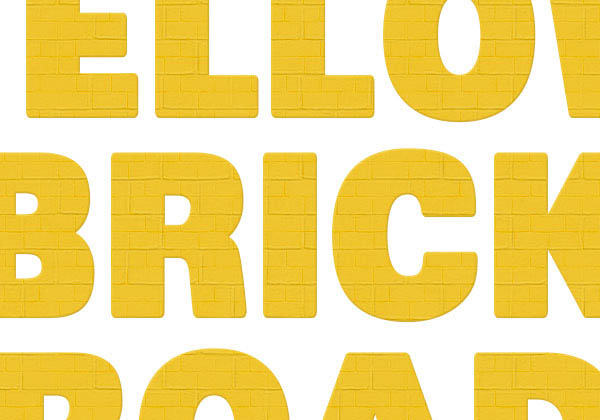
6、设置好后,我们的文字效果就像下面的图一样。
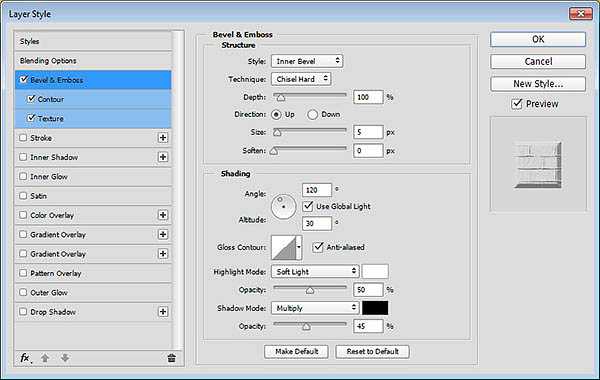
7、第一个文字副本样式设置: 斜面浮雕:内斜面,雕刻清晰 ,大小:5px,角度120°,柔光,透明度50%,正片叠底,透明度45%。
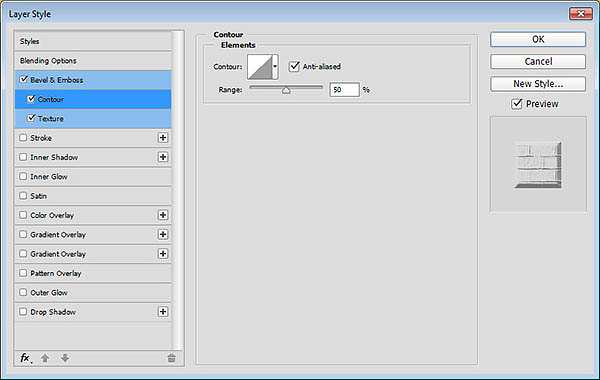
等高线,要勾上消除锯齿哦。
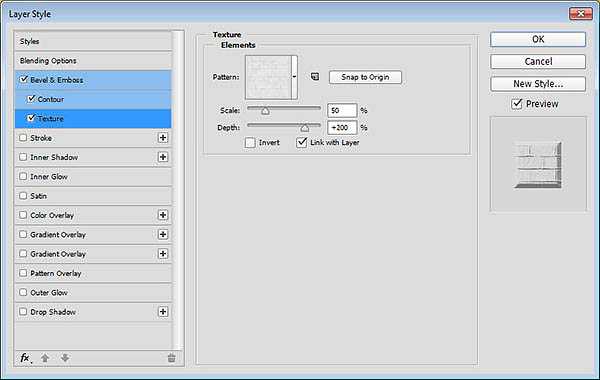
添加纹理,这里还是我们设置好的砖块纹理哦~范围:50%,深度:200%。
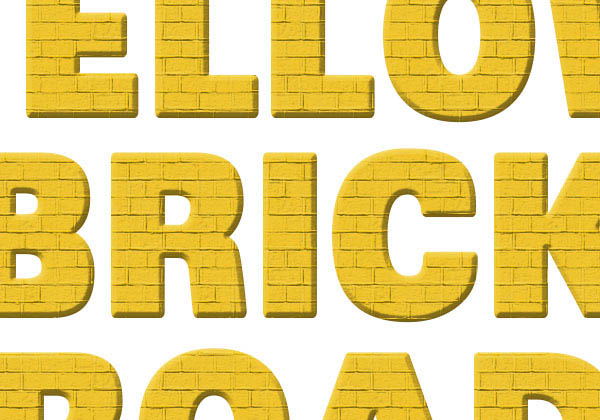
8、然后我们的第一个文字副本的效果就和下图一样啦。
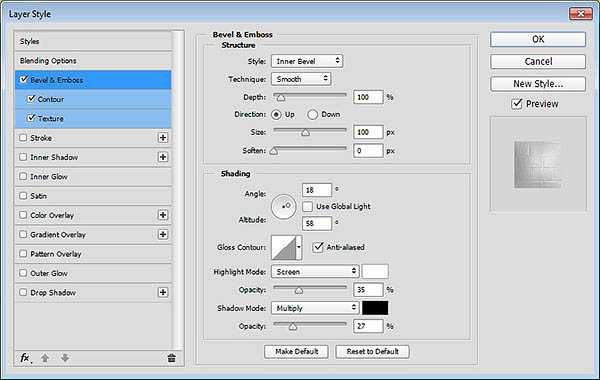
9、第二个文字副本样式: 斜面浮雕:内斜面,大小100%,注意:这里我们不使用全局光哦~角度18°,高度58°,选择消除锯齿,高光模式:柔光,35%,阴影模式:正片叠底,27%。
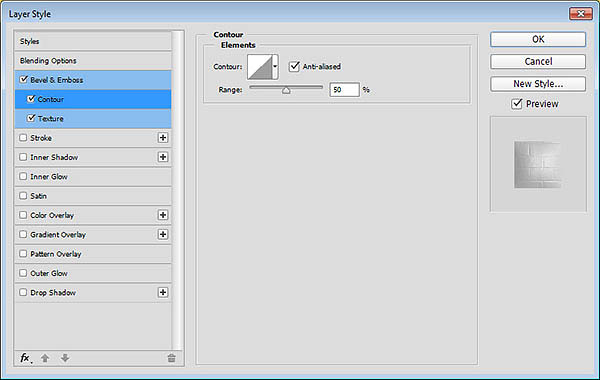
等高线,选择消除锯齿。
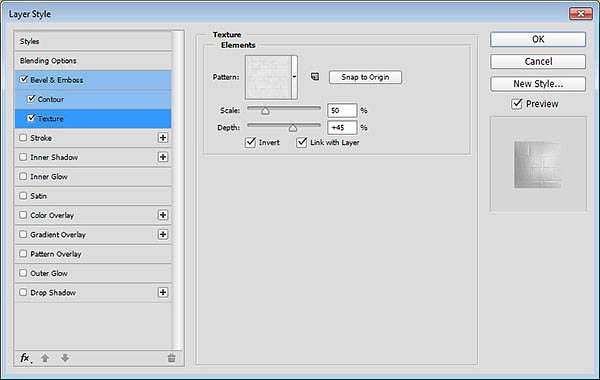
添加纹理,砖块纹理,范围50%,深度45%。注意这里要选择反相呢。
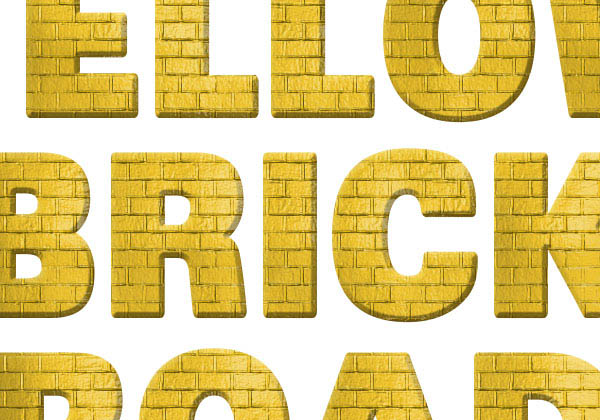
10、确定之后,我们的文字效果就像下面的图片所展示的一样啦。
上一页12 下一页 阅读全文
最终效果
1、新建图层1000*700px,在这个教程里我们用的字体是“SansBlack”哦~字体大小为230px,颜色是#f1cc4c。复制文字图层,改变填充为0%,然后复制它一次。
2、现在我们要打开“ BrickLargePainted0050 ”素材,然后去图像>图像大小,改变其大小为350*350px。
3、编辑>定义图案,确定。
4、打开“Grass0035”素材,改变其大小为320*320px,也将其编辑成自定义图案。
5、原文字样式设置:打开图层样式,斜面与浮雕: 内斜面,平滑,深度 100px,大小1,高光模式 :柔光,透明度50%,角度120°,阴影模式:正片叠底,透明度:10%。
等高线设置,范围:50%。
添加纹理,使用我们刚刚设置好的砖块纹理哦,宽度:280%。
图案叠加,颜色加深,图案使用我们刚刚设置好的砖块纹理哟。
6、设置好后,我们的文字效果就像下面的图一样。
7、第一个文字副本样式设置: 斜面浮雕:内斜面,雕刻清晰 ,大小:5px,角度120°,柔光,透明度50%,正片叠底,透明度45%。
等高线,要勾上消除锯齿哦。
添加纹理,这里还是我们设置好的砖块纹理哦~范围:50%,深度:200%。
8、然后我们的第一个文字副本的效果就和下图一样啦。
9、第二个文字副本样式: 斜面浮雕:内斜面,大小100%,注意:这里我们不使用全局光哦~角度18°,高度58°,选择消除锯齿,高光模式:柔光,35%,阴影模式:正片叠底,27%。
等高线,选择消除锯齿。
添加纹理,砖块纹理,范围50%,深度45%。注意这里要选择反相呢。
10、确定之后,我们的文字效果就像下面的图片所展示的一样啦。
上一页12 下一页 阅读全文