站长资源平面设计
Photoshop设计制作绚丽的放射粒子双十一文字
简介效果图制作分为两个部分:首先是粒子部分,用设置好的画笔描边文字路径,再设置好颜色得到初步的粒子效果;然后再用滤镜及图层叠加做出放射效果即可。最终效果1、新建一个1024 * 768像素的画布,分辨率为72,背景填充黑色。2、在图1上面右键选择“图片另存为”保持到本机,再用PS
效果图制作分为两个部分:首先是粒子部分,用设置好的画笔描边文字路径,再设置好颜色得到初步的粒子效果;然后再用滤镜及图层叠加做出放射效果即可。
最终效果

1、新建一个1024 * 768像素的画布,分辨率为72,背景填充黑色。
2、在图1上面右键选择“图片另存为”保持到本机,再用PS打开,用移动工具拖到新建的画布里面,调整好位置,效果如图2。

<图1>

<图2>
3、按住Ctrl + 鼠标左键点击文字缩略图载入文字选区,如下图。

<图3>
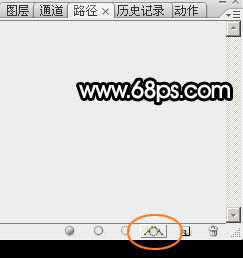
4、进入路径面板,点击图层面板的红圈内的图标。
<图4>
5、得到下图所示的路径,然后回到图层面板。

<图5>
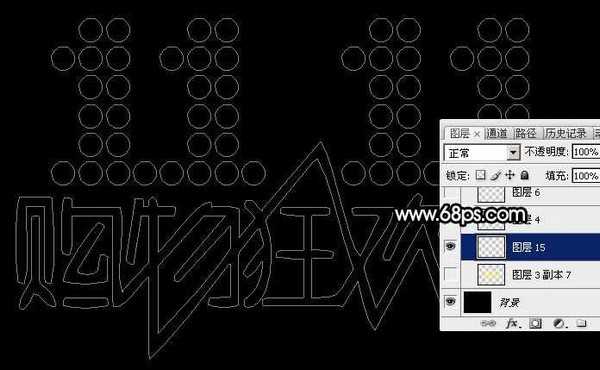
6、把原文字图层隐藏,路径效果如下图。
<图6>
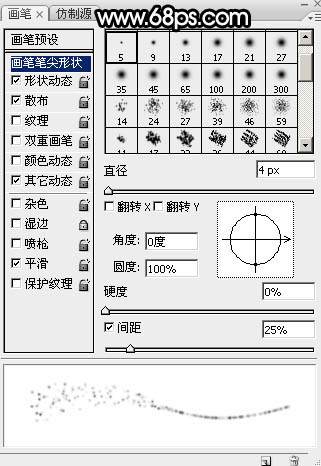
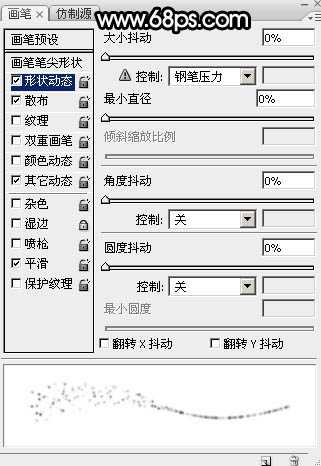
7、选择画笔工具,选择5号画笔,然后按F5调出画笔预设面板,设置参数:画笔笔尖形状、形状动态、散布、其它动态,设置好后勾选“平滑”选项,如下图。
<图7>
<图8>
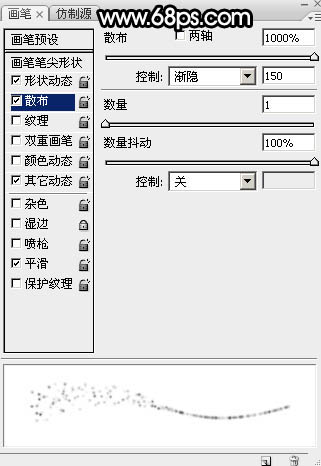
<图9>
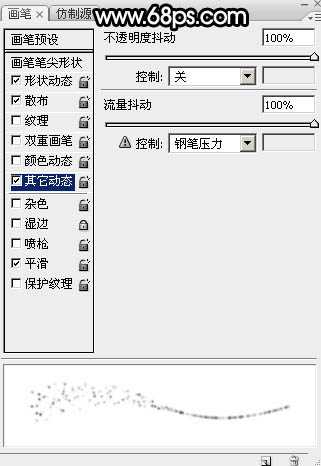
<图10>
8、把画笔大小设置为4像素,不透明度及流量都设置为100%,再把前景色设置为白色,如下图。

<图11>

<图12>
9、选择钢笔工具在路径上右键选择“描边路径”,在弹出的对话框选择“画笔”,不要勾选“模拟压力”。
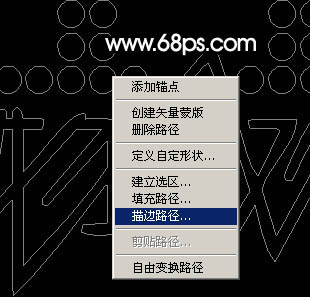
<图13>
10、确定后按回车键把路径隐藏,效果如下图。
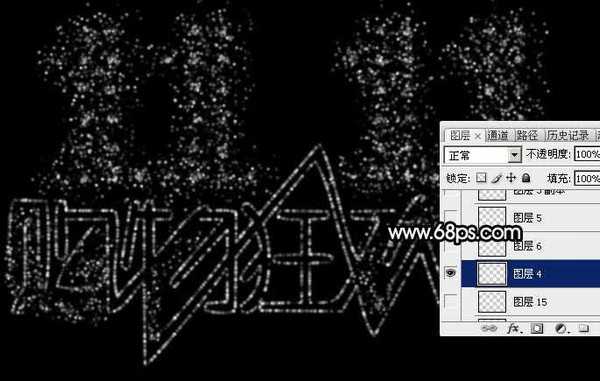
<图14>
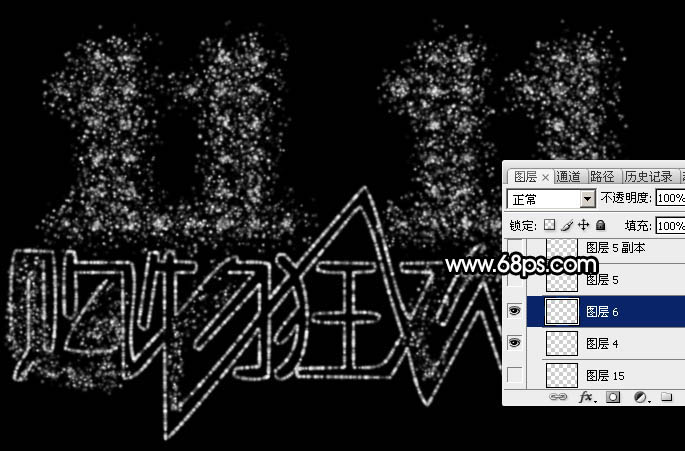
11、按Ctrl + J 把当前图层复制一层,效果如下图。
<图15>
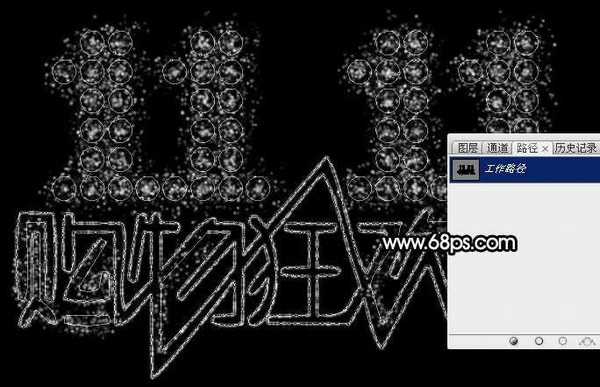
12、进入路径面板,点击文字路径调出路径,然后回到图层面板。
<图16>
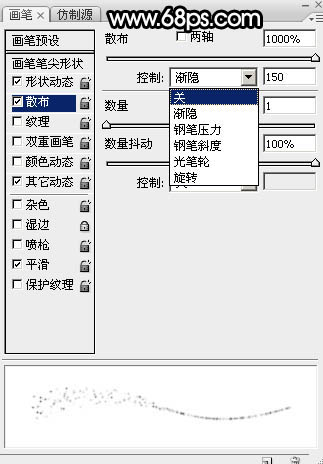
13、新建一个图层,选择画笔工具,按F5调出画笔预设面板,在散布中把下图所示的渐隐关闭,其它设置不变。
<图17>
14、把画笔大小设置为3像素,如下图。

<图18>
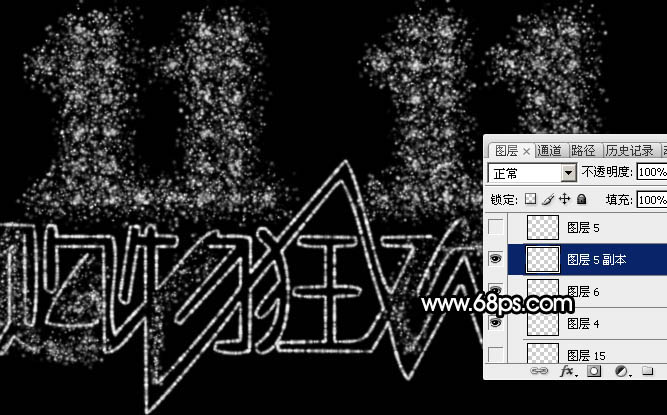
15、选择钢笔工具在路径上右键选择“描边路径”,确定后把路径隐藏,效果如下图。
<图19> 上一页12 下一页 阅读全文
最终效果

1、新建一个1024 * 768像素的画布,分辨率为72,背景填充黑色。
2、在图1上面右键选择“图片另存为”保持到本机,再用PS打开,用移动工具拖到新建的画布里面,调整好位置,效果如图2。

<图1>

<图2>
3、按住Ctrl + 鼠标左键点击文字缩略图载入文字选区,如下图。

<图3>
4、进入路径面板,点击图层面板的红圈内的图标。

<图4>
5、得到下图所示的路径,然后回到图层面板。

<图5>
6、把原文字图层隐藏,路径效果如下图。

<图6>
7、选择画笔工具,选择5号画笔,然后按F5调出画笔预设面板,设置参数:画笔笔尖形状、形状动态、散布、其它动态,设置好后勾选“平滑”选项,如下图。

<图7>

<图8>

<图9>

<图10>
8、把画笔大小设置为4像素,不透明度及流量都设置为100%,再把前景色设置为白色,如下图。

<图11>

<图12>
9、选择钢笔工具在路径上右键选择“描边路径”,在弹出的对话框选择“画笔”,不要勾选“模拟压力”。

<图13>
10、确定后按回车键把路径隐藏,效果如下图。

<图14>
11、按Ctrl + J 把当前图层复制一层,效果如下图。

<图15>
12、进入路径面板,点击文字路径调出路径,然后回到图层面板。

<图16>
13、新建一个图层,选择画笔工具,按F5调出画笔预设面板,在散布中把下图所示的渐隐关闭,其它设置不变。

<图17>
14、把画笔大小设置为3像素,如下图。

<图18>
15、选择钢笔工具在路径上右键选择“描边路径”,确定后把路径隐藏,效果如下图。

<图19> 上一页12 下一页 阅读全文
上一篇:PS制作漂亮的牛仔裤缝制文字效果