站长资源平面设计
Painter素描绘画工具实现手绘可爱漂亮的美女头像实例教程
绘制耗时:3小时
工具:Wacom 非凡系列手绘版 512级压力
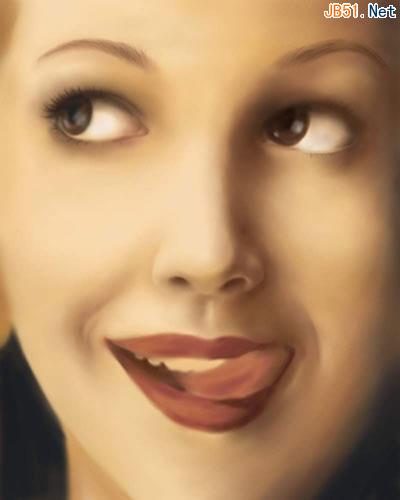
先看看成品吧:

接下来我们一步一步得慢慢说。
第一步:绘制线稿。初学者可以把照片儿垫在下面画,定位准确。不过这样就少了很多手绘的乐趣和创造力。绘制线稿一定要新建一层,粗一点儿没关系,最后会删掉的。我喜欢用Pencil-> Cover Pencil来画。虽然许多人推荐2B Pencil,但个人觉得笔触不是很细腻,而且对压力太敏感,512级别的板子画起来吃力。

第二步:在画布,也就背景层上,用Airbrush -> Digital Airbrush 来铺大色块。主要是让色彩循序渐进,基本的阴影关系一定要出来。深浅可以后面再调整。

第三步:现在把上面的线稿层透明度降低,我用的40%,别让它遮盖住了下面的细节。然后结合Digital Airbrush和Blender->Soft Blender Stump 增加一些更深的颜色,Blender的好处就是让色彩融合得更平滑。这幅画难点在嘴唇上,先别急着处理。给点儿主要色就够了。

选择颜色的时候尽量用吸管吸取画布上已有的颜色,一幅画色彩太多了容易出错。

第四步:现在增加一个新色进去,嘴唇的红色,我还是用的Digital Airbrush,键盘快捷键[ ],可以快速调整笔刷大小,比如牙齿的轮廓,就用2pixel的Airbrush绘制。

第五步:鼻子位于画面正中,是表现的重点,所以一定要细致。鼻孔千万别一下子就用黑色,最好是用吸管选择背景的深棕色,涂一个区域后,再用Blender晕开,让色彩接壤的地方平滑湿润。鼻子的高光也一定要处理的当。注意比较原图


第六步:眼睛是心灵的窗户,当然要细致得处理,先用Airbrush把深色的眼扩画出来,再用blender把接壤处平滑处理,眼睫毛我喜欢用 Gouache->Fine Round Gouache来画,质感要比Airbrush更好些,而且硬一点儿。过程中一定要随时放大、缩小,不要让画面比例失调。画完以后就可以把线稿层删掉了。


注意看看细节:眼窝右边有一些小小的红色,会让色彩更立体。眉毛的话,我喜欢用Fine Round Gouache和Cover Pencil交替使用。 Fine Round Gouache画浅色,较粗的眉根;Cover Pencil画深色、较细的眉尾。眼珠部分一定要用些白色的薄涂,显得更透明。

第七步,用Gouache小笔刷,给眼睛的轮廓出增加一些白色高光,会让眼睛更加水灵迷人。

第八步:现在来处理一下人物的酒涡,还有嘴唇周围的颜色,尽量深一点儿,便于红色嘴唇的上色,不会显得太突兀。看看,当酒涡的效果出来之后,人物就很细腻了。让我们开始细致处理嘴唇吧,舌头的轮廓要清晰,阴影要明确。否则会很奇怪。

第九步:牙齿的轮廓用Cover Pencil先勾勒出来,再用Airbrush的小笔刷上颜色。不要用太白的色彩,用偏兰的白色比较适合牙齿。舌头上的静脉,就用Cover Pencil配合Blender来描绘。为了让画面更丰满,我没有按照原始照片,而是自己在左边加了鬓发,如果你把眼睛画出来了,鬓发就简直是Piece of cake了。


第十步:给鼻子和脸颊加点高光吧。画面会立体的。记得把Digital Airbrush的强度调低点儿。

第十一步:嘴唇,难吧? 用Cover Pencil在嘴唇上画一些细致的线条,排列稍微整齐点儿。然后用Blender把色彩晕开,否则会太尖锐了。舌头上用Cover Pencil 点一些浅色得点,再用Blender晕开边缘。效果不错。

或者我们来详细比较一下嘴唇处理前后的效果


第十二步:在右下角加上自己的签名。大功告成了~

当然,最后可以放到Photoshop里面去改一下颜色,饱和度高些更像是美国招贴画。黑白效果模拟素描

